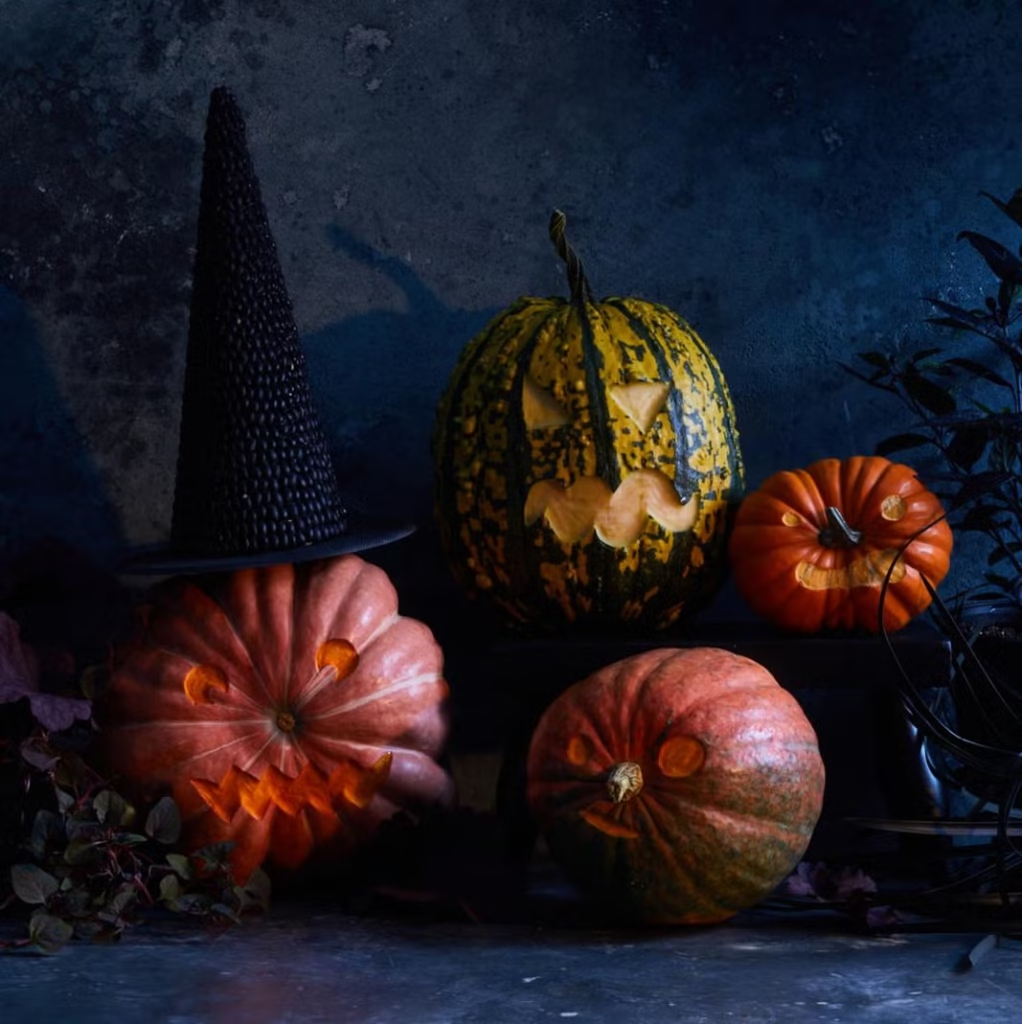
This Halloween, don’t limit yourself to traditional jack-o’-lanterns. While creepy-faced gourds are always a wonderful addition to the front porch, there are lots of other simple pumpkin carving ideas to keep the Halloween tradition going.
To begin off the Halloween season, consider skeleton arms, autumn foliage, vampires, and candy-inspired themes.
If you’re a newbie, go with a plain look, or try a more intricate carve. This list contains jack-o’-lantern ideas for all ages and skill levels. Each idea also contains step-by-step carving directions, links to printable templates, and how-to hints.
Choose a design that appeals to you and gather your supplies—X-Acto knives, linocut tools, LED lights, and washable chalk markers are some of the most common. And if carving isn’t your thing, check out our favorite no-carve and painted pumpkin designs!
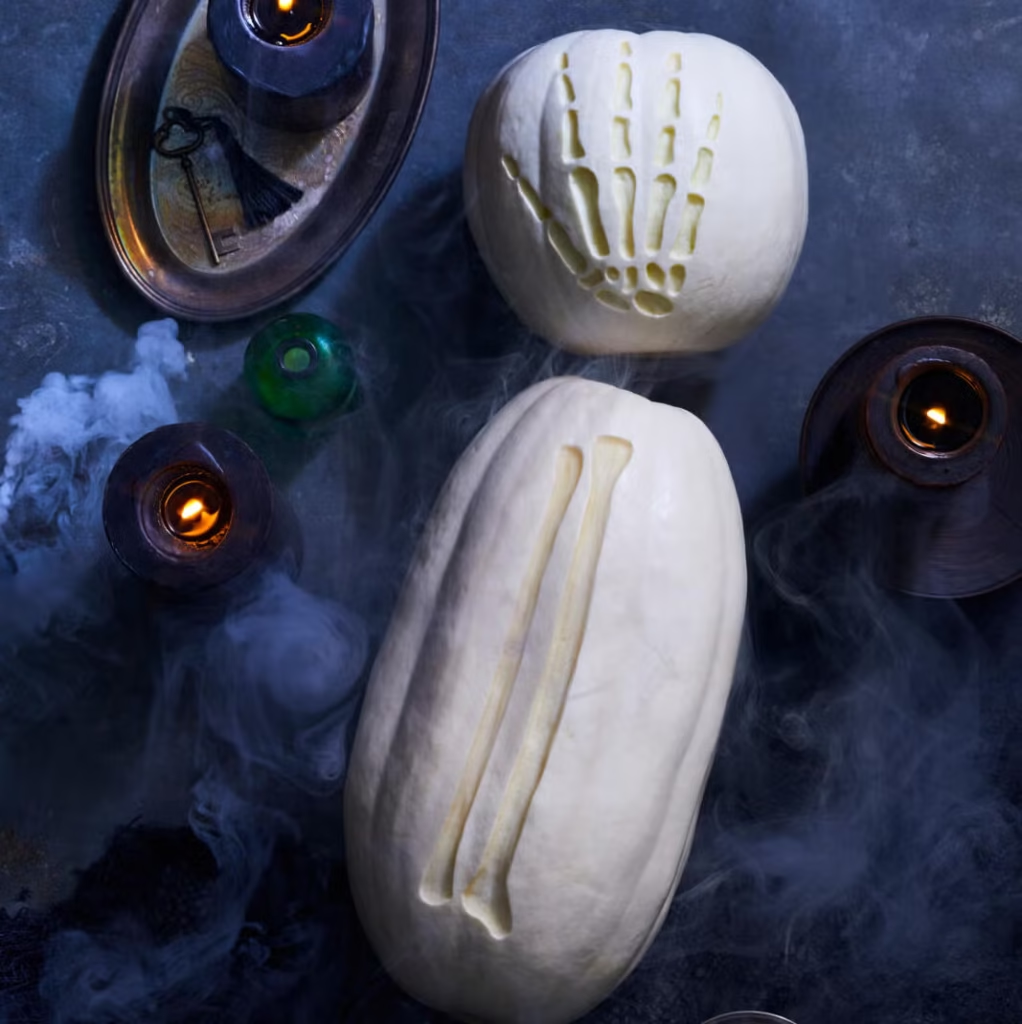
1. Skeleton Arm
Give your porch a bone-chilling twist with a carved skeleton arm. Trace a skeleton arm template onto two white pumpkins — one long and one round — then carve only the surface using linocut tools. Lightly spray vinegar to preserve the design, and place them together for a realistic, spine-tingling display.
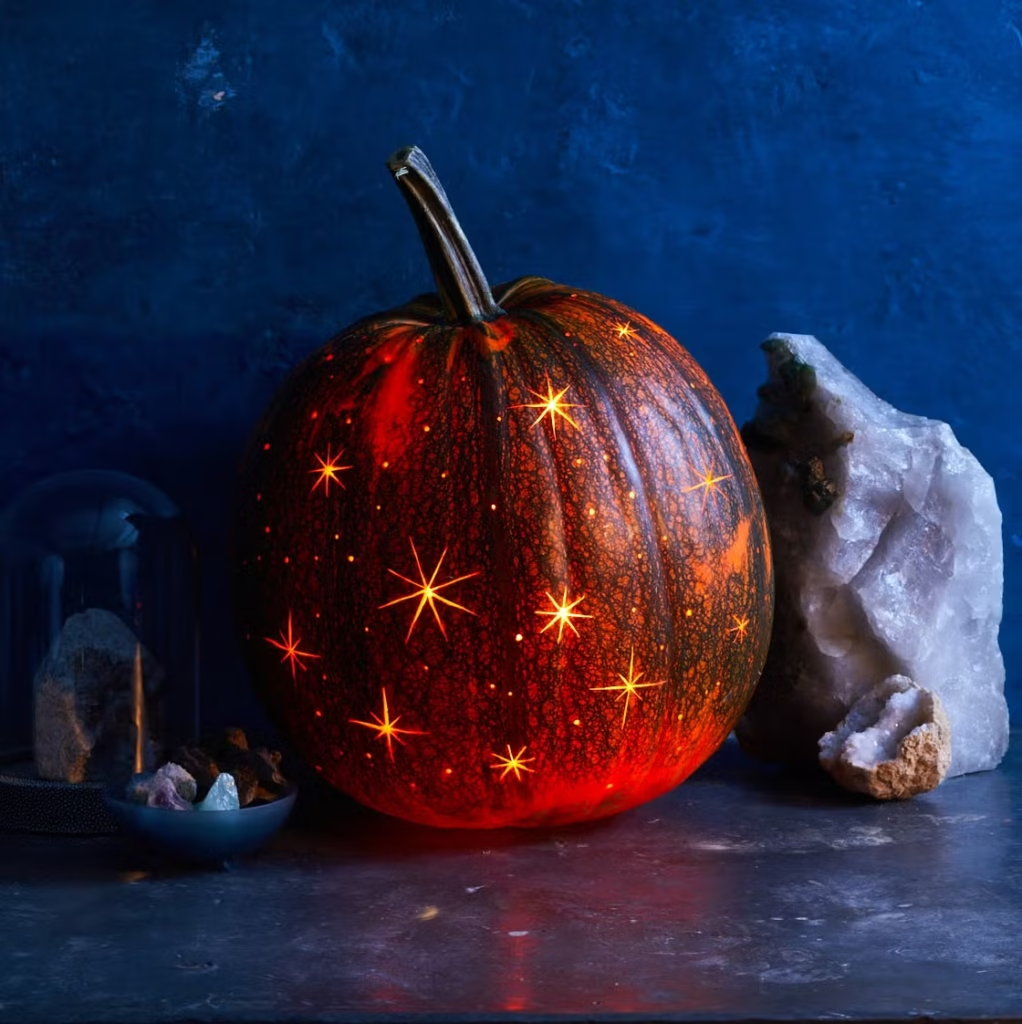
2. Starry Night
Bring the night sky to your doorstep with this starry design. Hollow a large pumpkin from the bottom and poke holes of different sizes using skewers. Add starburst details with a small carving knife. Place LED lights inside to cast a celestial glow that’s both haunting and beautiful.
3. Wonky Faces
Embrace imperfections and have fun creating quirky characters! Use the natural bumps and shapes of your pumpkins to inspire funny or eerie faces. Sketch your design with a chalk marker, carve the surface with linocut tools, and spray with vinegar to preserve it. The more imperfect, the more personality your pumpkin will have.
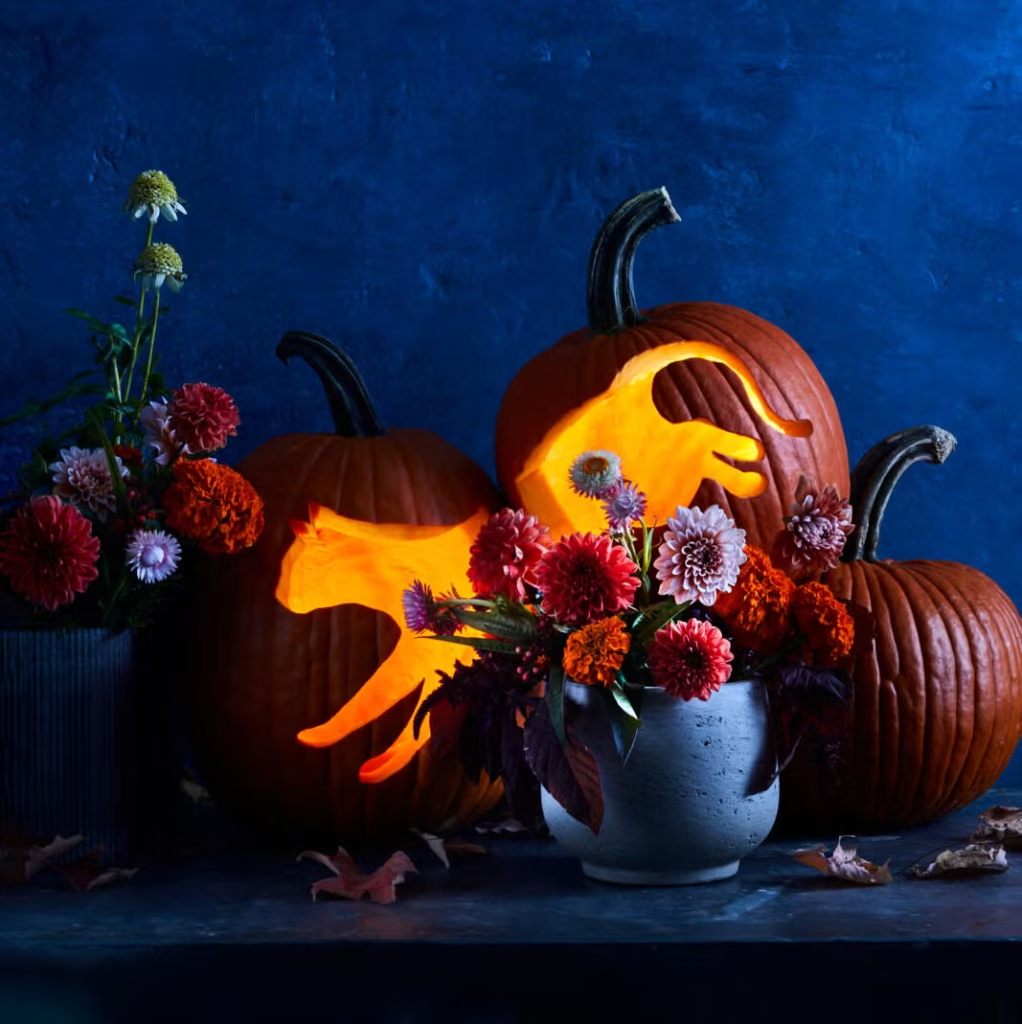
4. Pumpkin Diptych
Add a dramatic twist to your display with this clever feline design. Hollow two pumpkins, trace a cat silhouette, and carve carefully. Position a third pumpkin to make it look like the cat is leaping across your porch. Use bamboo skewers for stability and LED lights for a glowing nighttime effect.
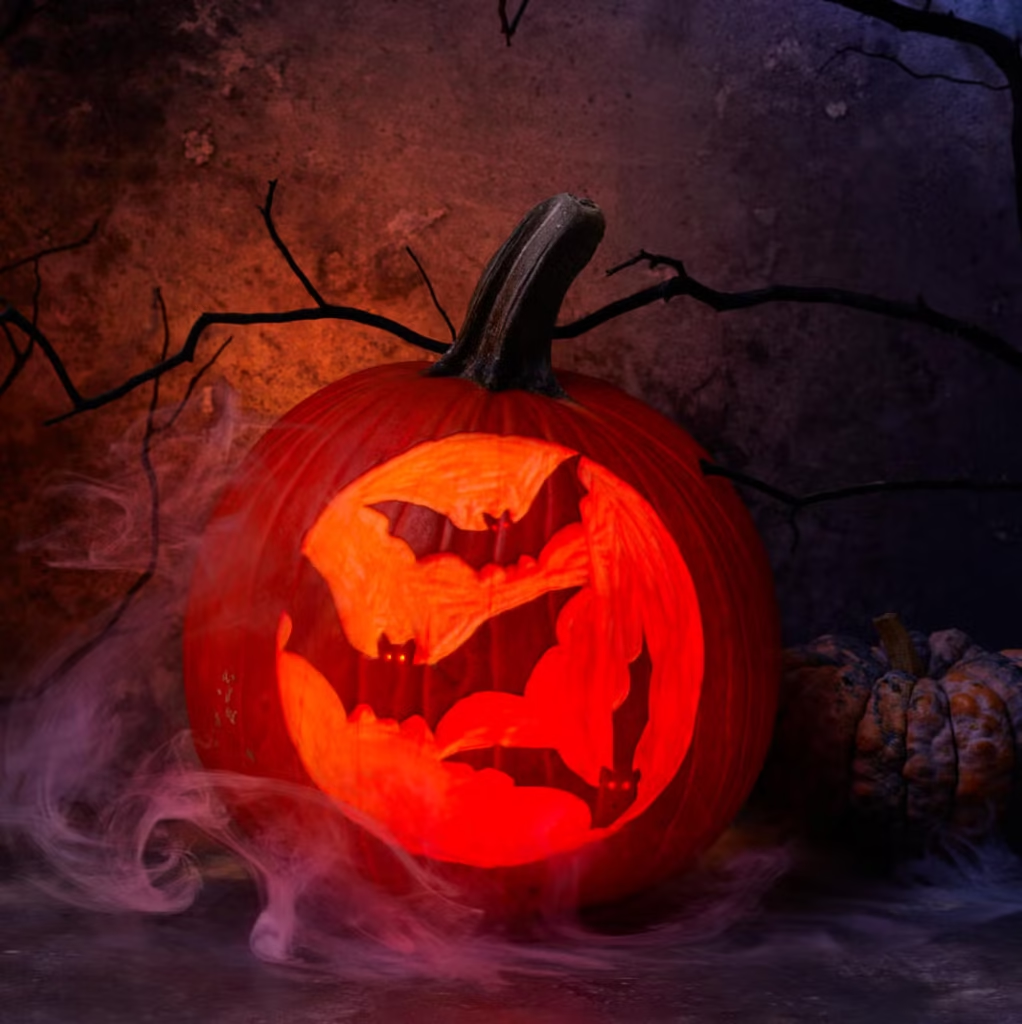
5. Moonlight Bat Silhouette
Capture the essence of Halloween night with this bat-themed pumpkin. Trace a bat silhouette template onto your pumpkin, then carve away the surrounding skin to leave the bats in relief. Poke small holes for starry eyes and light it up with LEDs. The eerie shadow play will delight trick-or-treaters.

6. Boo!
Sometimes simplicity steals the show. Hollow out your pumpkin and carve “BOO!” in bold letters across the front. Add a flickering light inside for that classic Halloween glow that never goes out of style. It’s easy, fun, and perfect for all skill levels.

7. Flower Vase
Skip the candles and go floral. Carve out the top of your pumpkin and fill it with autumn blooms like sunflowers or chrysanthemums. This cozy twist turns your jack-o’-lantern into a warm, welcoming centerpiece for your porch or table—ideal for blending spooky with seasonal charm.

8. Owl Jack-o’-Lantern
Turn your pumpkin into a nocturnal masterpiece. Draw owl eyes, feathers, and a beak freehand, then carve along your lines. This design works especially well with white or pale pumpkins, creating a ghostly glow when lit. It’s whimsical, detailed, and sure to draw a crowd.

9. Scalloped Edge Pumpkins
Add elegance to your display with scalloped edges. Hollow your pumpkin from the bottom, then carve repeating V-shaped notches around the top opening. Use as a glowing bowl with a tealight inside, or stack multiple scalloped pumpkins for a chic mantelpiece arrangement.

10. Swamp Pumpkin
Let your imagination run wild with this playful “swamp scene.” Use a melon baller to cut round holes into your pumpkin, then add toy frogs, bugs, and moss for decoration. Surround it with twigs or tall grass for a spooky, nature-inspired display that’s equal parts creepy and cute.
Carving Tips for Lasting Designs
To keep your pumpkins fresh, store them in a cool, dry place or refrigerate overnight. Applying a thin layer of petroleum jelly to the carved edges helps lock in moisture. Use LED lights instead of real candles to avoid heat damage and enjoy your glowing designs longer.
Light Up Your Halloween
From skeletons to stars, every carved pumpkin tells a story. These easy and imaginative ideas will help your home glow with personality and festive spirit. So grab your carving tools, cue up the spooky tunes, and create a Halloween display that’s sure to impress every ghost and ghoul on the block.
FAQs
What is the best pumpkin to carve for Halloween?
Medium to large pumpkins with smooth, firm skin are best for carving. Choose one with a flat base for stability and a bright orange color to ensure freshness. Avoid soft spots or shriveled stems, which can indicate the pumpkin is overripe.
How can I make my carved pumpkin last longer?
Keep your pumpkin cool and out of direct sunlight. When not on display, store it in the refrigerator or a shaded area. Applying a thin layer of petroleum jelly along the carved edges helps lock in moisture and slow down the drying process.
What tools should I use for pumpkin carving?
Use a small serrated knife for detailed cuts, an ice cream scoop for removing the insides, and a potato peeler or linocut tool for surface carving. Metal cookie cutters and stencils are also great for creating clean shapes safely.
What are some easy pumpkin carving ideas for beginners?
Simple designs like a smiling face, star patterns, or the word ‘BOO!’ are great for beginners. Painted pumpkins or ones decorated with props—like flowers or googly eyes—are fun alternatives that don’t require much carving skill.
Can I use the pumpkin after carving?
Absolutely! Roast the seeds for a crunchy snack or use the leftover flesh in soups, breads, or pies. Just remember not to use any pumpkin that’s been sitting out for days or exposed to candles, as it may no longer be safe to eat.